Engine Coolant Thermostat Replacement for GMC Truck TopKick C-Series (Conventional) C4/C5 2003
Engine Coolant Thermostat Replacement 6.6L (LB7) Engine
Removal Procedure
- Drain the engine coolant. Refer to Cooling System Draining and Filling .
- Remove the water outlet tube. Refer to Water Outlet Tube Replacement .
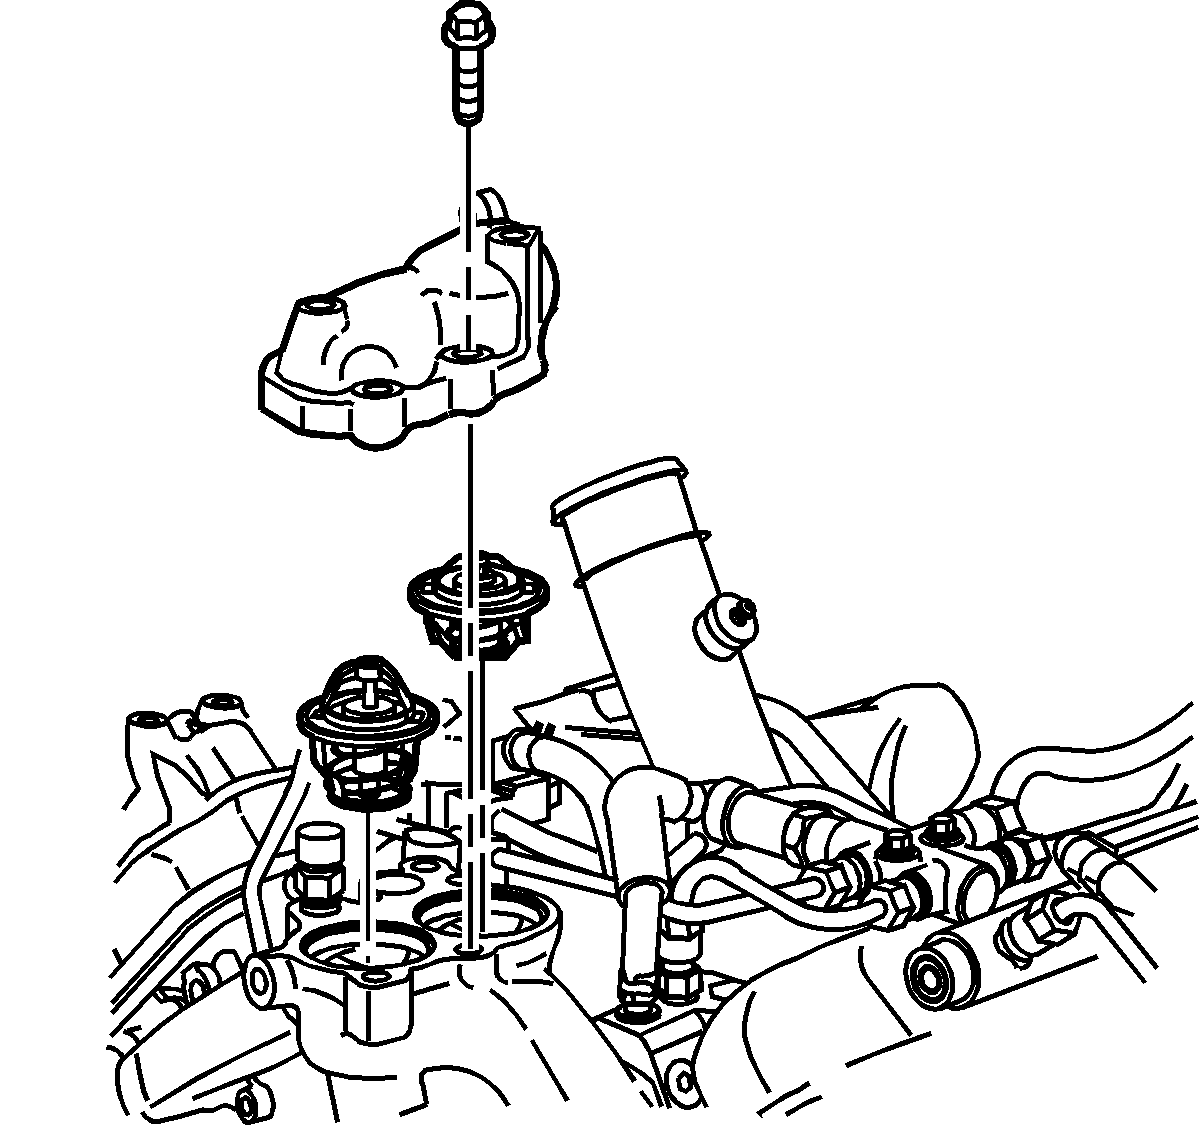
- Remove the bolt for the fuel line bracket.
- Remove the 4 bolts retaining the thermostat housing cover.
- Remove the 2 thermostats with the seals.
Inspection and Repair Procedure
- Inspect the thermostats for sticking, cracks, and leakage of wax.
- Replace the thermostats if damage is found.
- Clean the thermostat housing and thermostat housing cover sealing surfaces.
Installation Procedure
- Install the 2 thermostats with the seals to the thermostat housing.
- Install the thermostat housing cover.
- Install the fuel line bracket bolt.
- Install the water outlet tube. Refer to Water Outlet Tube Replacement .
- Fill the engine coolant. Refer to Cooling System Draining and Filling .

The rear thermostat (4) has 2 vent valves. Install with the vent valves towards the rear of engine.
Notice: Use the correct fastener in the correct location. Replacement fasteners must be the correct part number for that application. Fasteners requiring replacement or fasteners requiring the use of thread locking compound or sealant are identified in the service procedure. Do not use paints, lubricants, or corrosion inhibitors on fasteners or fastener joint surfaces unless specified. These coatings affect fastener torque and joint clamping force and may damage the fastener. Use the correct tightening sequence and specifications when installing fasteners in order to avoid damage to parts and systems.
Tighten
Tighten the thermostat housing cover bolts to 21 N·m (15 lb ft).
Tighten
Tighten the fuel line bracket and bolt to 21 N·m (1 lb ft).
Engine Coolant Thermostat Replacement L18
Removal Procedure
- Drain the radiator until the coolant level is below the thermostat.
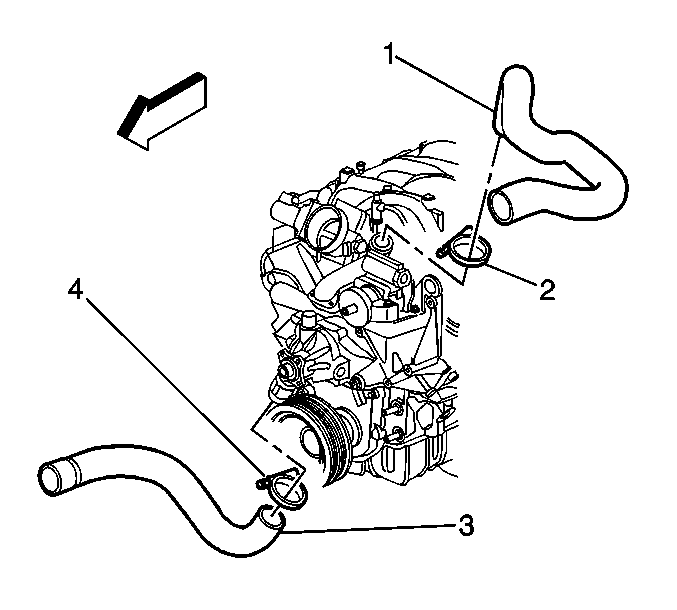
- Loosen the inlet hose clamp (2) at the coolant crossover.
- Remove the inlet hose (1) from the coolant crossover.
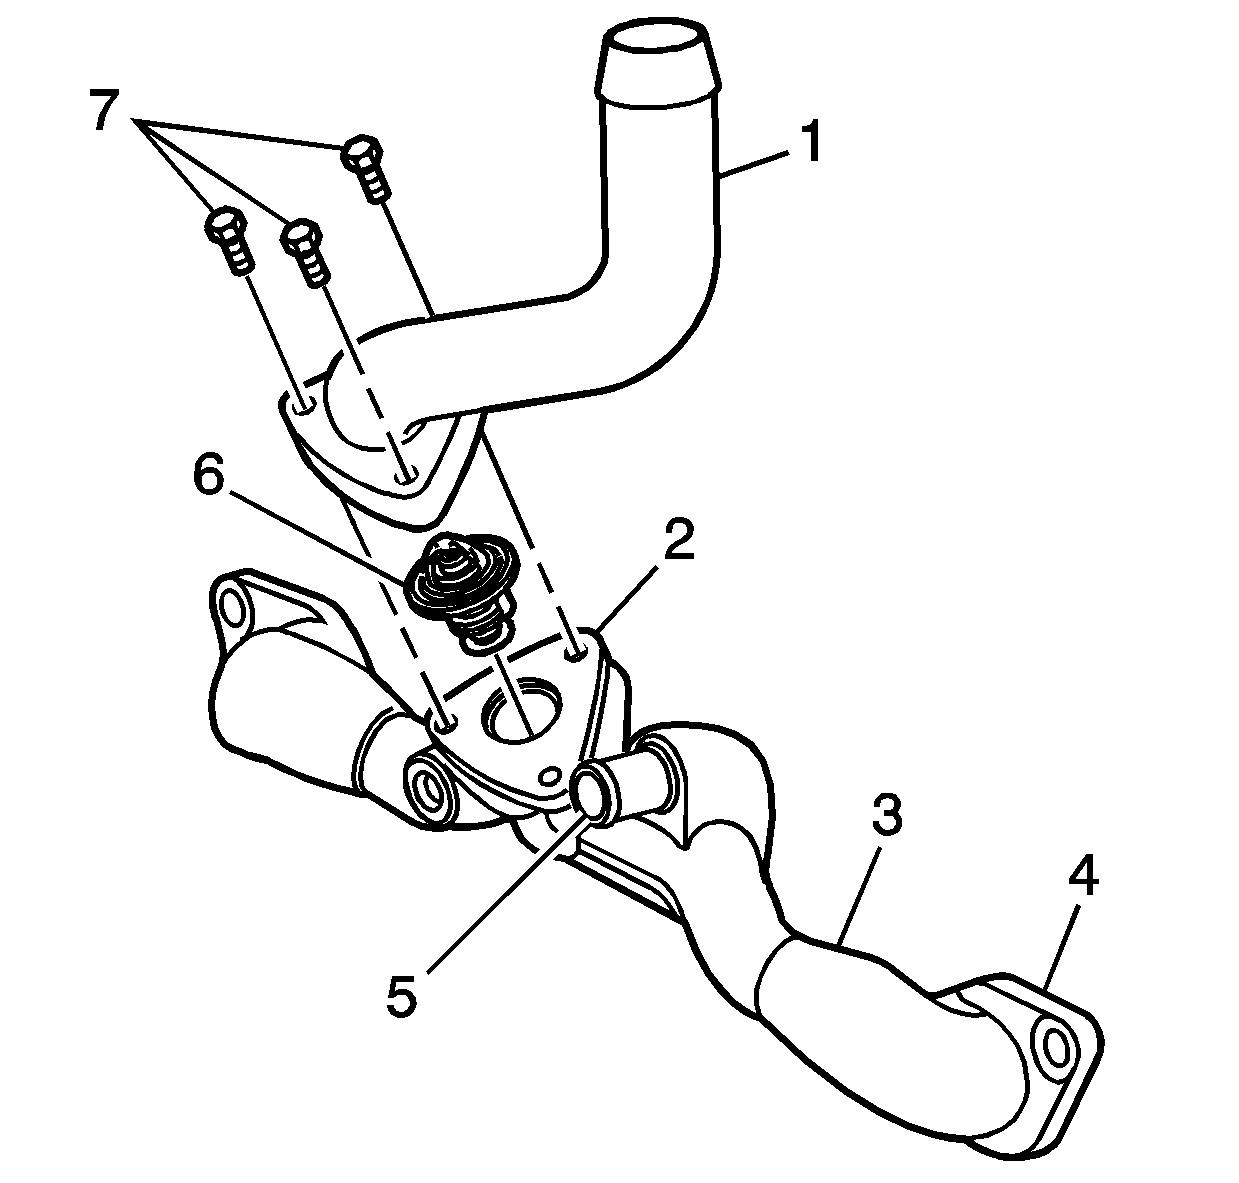
- Remove the water outlet bolts (7).
- Remove the water outlet (1).
- Remove the thermostat (6) from the coolant crossover (3).
Installation Procedure
- Install the thermostat (6) into the coolant crossover (3).
- Install the water outlet (1).
- Install the water outlet bolts (7).
- Install the inlet hose (1) to the coolant crossover.
- Tighten the inlet hose clamp (2) at the coolant crossover.
- Fill the radiator until the coolant level is above the thermostat.
Notice: Use the correct fastener in the correct location. Replacement fasteners must be the correct part number for that application. Fasteners requiring replacement or fasteners requiring the use of thread locking compound or sealant are identified in the service procedure. Do not use paints, lubricants, or corrosion inhibitors on fasteners or fastener joint surfaces unless specified. These coatings affect fastener torque and joint clamping force and may damage the fastener. Use the correct tightening sequence and specifications when installing fasteners in order to avoid damage to parts and systems.
Tighten
Tighten the water outlet bolts to 30 N·m (22 lb ft).
Tighten
Tighten the inlet hose clamp to 5 N·m (44 lb in).
Engine Coolant Thermostat Replacement Caterpillar
Refer to the Caterpillar® Service Manual.
