Removal Procedure
Caution: In order to Reduce the Risk of Fire and Personal Injury:
| • | If nylon fuel pipes are nicked, scratched or damaged during installation,
Do Not attempt to repair the sections of the nylon fuel pipes. Replace them. |
| • | When installing new fuel pipes, Do Not hammer directly on the
fuel harness body clips as it may damage the nylon pipes resulting in a possible
fuel leak. |
| • | Always cover nylon vapor pipes with a wet towel before using a
torch near them. Also, never expose the vehicle to temperatures higher than
115°C (239°F) for more than one hour, or more than 90°C (194°F)
for any extended period. |
| • | Before connecting fuel pipe fittings, always apply a few drops
of clean engine oil to the male pipe ends. This will ensure proper reconnection
and prevent a possible fuel leak. (During normal operation, the O-rings located
in the female connector will swell and may prevent proper reconnection if
not lubricated.) |
Notice: Do not attempt to straighten any kinked nylon fuel lines.
Replace any kinked nylon fuel feed or return pipes in order to prevent damage
to the vehicle.
Notice: Cap the fittings and plug the holes when servicing the fuel system in
order to prevent dirt and other contaminants from entering the open
pipes and passages.
- Remove the engine and transmission as an assembly. Refer to
Engine Replacement
in Engine Mechanical.

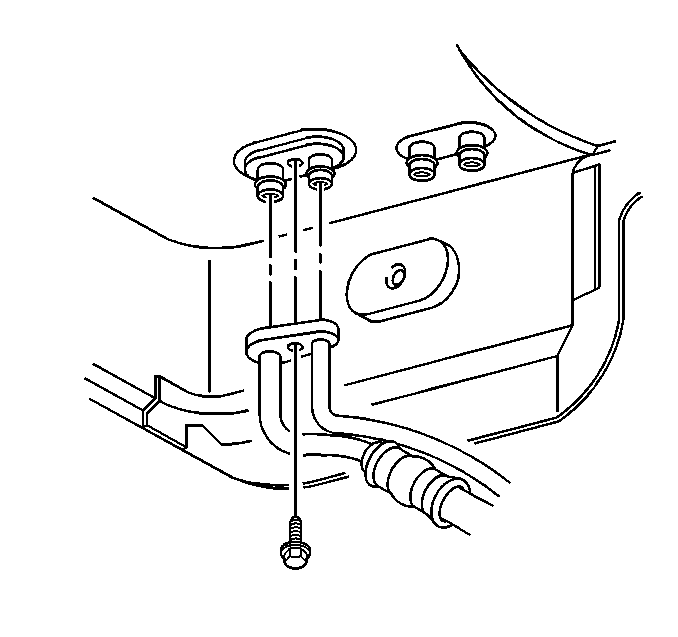
- Disconnect the fuel feed
pipe (2) from the fuel filter and the return pipe from the rear return pipe
(4).
- Perform the following
procedures if equipped with auxiliary rear air and heat.
| 3.1. | Disconnect the rear heater and A/C pipes from the rear heating,
ventilation, and air conditioning (HVAC) module. Refer to
Auxiliary HVAC Module Replacement
in Heating, Ventilation and
Air Conditioning. |
| 3.2. | Move the rear heater and A/C pipes in order to remove the fuel
pipes. |
- Note the position of the fuel pipes and the attaching hardware
for installation.

- Disconnect the fuel pipes
(1) from the engine compartment attaching clip.
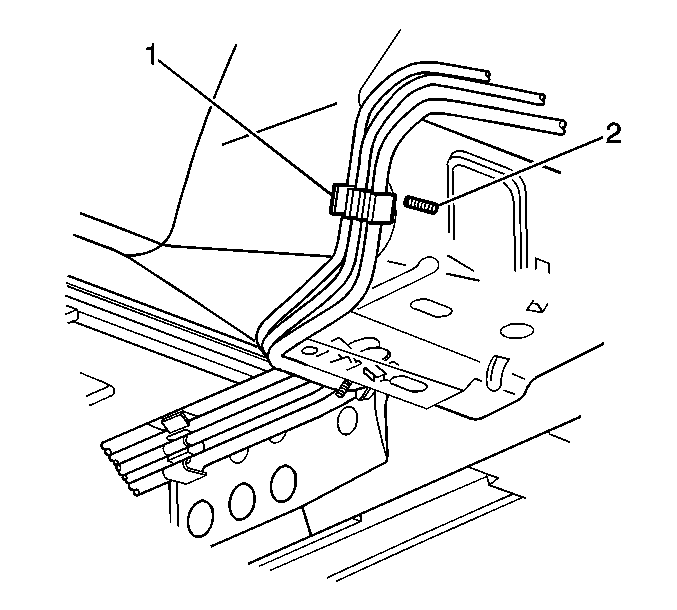
- Disconnect the fuel pipes
from the chassis attaching clip (1).

- Remove the fuel pipes.
- Inspect the pipes for bends, kinks, and cracks.
- Replace the pipe or pipes as required.
Installation Procedure
- Install the fuel pipes.
- Install the fuel pipes
into the chassis attaching clip (1).
- Install the fuel pipes
(1) into the engine compartment attaching clip.
- Perform the following
procedures if equipped with auxiliary rear air and heat.
| 4.1. | Move the rear heater and A/C pipes into their original position. |
- Connect the fuel feed
pipe (2) to the fuel filter and the return pipe to the rear return pipe (4).
- Install the engine and transmission as an assembly. Refer to
Engine Replacement
in Engine Mechanical.
